The quick mask tool is good for when your editing your photos because it gives you better control over the areas you have selected.
To make a selection using the quick mask, press the Q key or select the quick mask icon on to tool bar.
You can preview and edit a selection in quick mask, the selection is a transparent pink colour. This helps you to see what parts you have selected and what you still need to select or even unselect.
The area which has been selected will not be effected as it has been marked, but you can edit this area by inverting your selection, this will mask off everything outside the orginal selection.
For my photography Brief we have to do a album cover. we had to choose a name of a list with all different albums on there, i choose The velvet underground, Loaded. I did think of a few ideas such as a Gun, Money, a loaded truck and more. I decided to do Money. I have done a few sketches of what i will be doing, I only have three sketches. ( will be uploaded soon).
Wednesday, 4 May 2011
Line drawing
Step one: Open photo in photoshop. double click on the background layer to make it a normal layer. Then duplicate layer twice so you have 3 layers all the same.
Step 2:Select the top layer and change the blendind mode of the layer to 'colour dodge' from layer styles drop down list. then go to image then adjustments and invert, which the photo will white out at this point.
Step 3: then go the filter > blur > Gauusain Blue. The amount of blue you use depends of the picture and resolution. i used 3.8 for mine.
Step 4: now take the hue/adjustment layer and desaturate the image, take the atuation bar to -100. This removes all the colour infomation.
Step 5: now you have my line drawing.
Next step: 1. Print off your line drawing and paint or colour the picture
2. scan the picture on a flatbed scanner at 300dpi.
Digital formats... JPEG,TIFF,RAW,DNG,PSD.
JPEG files are small, good quality and compatible with pretty much every peice of hardware and software in the world. JPEG files are compressed to make them easier to store or to be transferred, by this compressing the file you will lose quality depending on the level of compression.
JPEG - positives
compressed to small files, less room, quick to copy and open on any computer
negatives
lossing format, lose quality
TIFF files are larger than JPEGs because of this the files are a higher quality. TIFF files can also be saved with layers which can be created on photoshop and saved, so when you re-opened that file all the layers will still separate and you will be able to carry on and edit them.
BMP files are generally uncompressed and retain all the image information of the original copy, but this file cannot save layers..
PNG files were created for internet display, Like TIFF files they compression the file but not much so the file size will still be large, and like GIF files which PNG was created to replace can store animation information.
RAW files are used when taking an actual photo, and as the name says it saves the raw image you have just shot so during editing you can do anything to it for example: blown out highlights or dark areas can be retained as the data in those parts have been saved with some detail even though they are not visible at first. RAW files are much bigger than jpeg, you have to use special software for opening and editing RAW files, such as photoshop.
Healing Brush
Healing Brush.
Step 1:. Upload the photo to photoshop
Step 2:. Click on the healing brush tool.
Step 3:. Press Ctrl and click on the area you want to heal, you will see on my print screen the circle bit, that is where i was healing her skin, you can see the diffrence in first picture compared to this photo. Also the circle you can make bigger if you want to heal somethink big or small, i use the buttons [ small or ] high.
Andy Potts
This picture is realy good, i love the layout and the colours. i also love how it looks like there is 'signal' coming from there.
This photo is good, im not sure weather they are real people or not, but i love how they are in all diffrent colours, and it looks like they are in 'the city'
This photo is very colourful which is why i choose it, it caught my eye.
Andy potts work is inspring, you can tell that he puts a lot of effort into it.
Friday, 18 March 2011
Research Artists, Loretta Lux.
I like this photo beacuse she has made it look like a girl is 'creeping' up on her, i love how plain the background is, the colours are so nutrul.
I love this photo too, she has made her look like a 'real life' barbie doll. this is similar to a photoshoot i want to do.
Again i love this photo, she has made it fairytale, the colours are really good and go together well.
Lorretta Lux work is really good, all her pictures seem so 'fake' but yet they are so 'real'. all her colours go well together, If they are bright she makes it look good and the nutrul colours look good too. she is very inspiring to me i will deffintley try some of her work out in the furture.
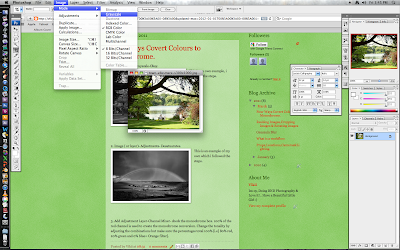
Four Ways Covert Colours to Monochrome.
1. Image- Mode-Grayscale-Okay.
This is my own example, i followed the steps.

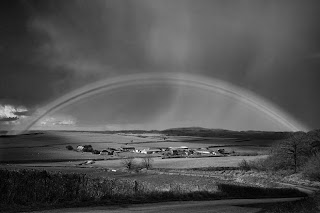
2. Image ( or layer)- Adjustments- Desatuarates.

This is an example of my own which i followed the steps.
This is my own example, i followed the steps.

2. Image ( or layer)- Adjustments- Desatuarates.

This is an example of my own which i followed the steps.
3. Add Adjustment Layer-Channel Mixer- check the monochrome box. 100% of the red channel is used to create the monochrome conversion. Change the tonality by adjusting the combinations but make sure the percentages total 100% [i.e] 80% red, 20% green and 0% blue= Orange filter].

This is an example of my own, which i followed the steps.
4. Add Adjustment layer- Hue/Satuations adjustment layer and select okay. Change the blend mode for this layer from normal colour. now open hue/satuation layer and adjust the sliders to gain the desired effect.
this is an example of my own, following the steps.
Wednesday, 16 March 2011
Resizing Images,Cropping Images & Rotating Images
Resize Images: select the layer picture to want to resize( or the layer) then press CTRL and T at the same time in your keyboard, you can resize the picture in any directions.
When you finish you must press enter. you can also do it this way go to edit- free transform or edit -transform and then choose an appropriate transformations you want.
To reduce the canvas size you have to go to image-canvas( or press ALT + CTRL + C) size and then adjust the size of the canvas according to size which need to be remove.
Croping Images: Click on "File" and then "Open." Select the photograph you want to work with and then click the "Open" button. It should pop up into the editing area of Photoshop.Click on the "Crop" tool. It should be on the main editing toolbar.With the "Crop" tool selected, click and drag over the part of the photo you want to work with. A box should appear. The area inside the box will be what is left after the crop is complete, so manipulate the size until you are satisfied with what your edited photo will look like.Press "Enter". The program will then crop the photo automaticly, and the edited pic will now appear in the edit window.
rotating images: Click Rotate from the Image menu and choose the degrees of rotation.
To enter a specific number, select Free and type in the number. Click OK
Gaussain Blur
Gaussian Blur allows you to blur a photo as much as you want.
To get this effect on photoshop click on filter, then scroll down to blur then click on gaussian blur.
got some examples of what to do:
This is showing how to do it.
This is showing how what steps to take.
This is my own Version of doing the Gaussian
Blur.
What is a workflow.
A workflow consists of a sequence of connected steps. It is a depiction of a sequence of operations, declared as work of a person, a group of persons,an organization of staff, or one or more simple or complex mechanisms. Workflow may be seen as any abstraction of real work, For control purposes workflow may be a view on real work under a chosen aspect, thus serving as a virtual representation of actual work. The flow being described often refers to a document that is being transferred from one step to another.
A workflow is a model to represent real work for further assessment. More abstractly, a workflow is a pattern of activity enabled by a systematic organization of resources, defined roles and mass, energy and information flows, into a work process that can be documented and learned.
Workflows are designed to achieve processing intents of some sort, such as physical transformation, service provision, or information processing.
Props,Locations,Cameras&Lighting.
When i do my shoot for my pictures, i am not doing any spercific location.
The only props i am using is money beacuse i am taking photos of it.
i am using a hand but this vasrys from all diffrent size's, i have used mine, my daughters and a mans hand to see which one looks better with writting over it so it indicates 'Loaded'. The lighting i am using is natrul light and maybe a flash depending when i take my photos.
I used my Nikon d3000 to shoot my photos on.
Wednesday, 19 January 2011
Other Album Covers.
This is Eminem album cover. I choose to put this on here, as i thought this was a good album cover, i like how theres bits on his face, they look like little seeds. It shows that its a over 18 CD, beacuse of the Parental Adviosery logo. I dont think this covers stands out alot as its to
This is Christina Aguleria Album cover, I really like this beacuse it look likes she has things what are working her brain. The way this is set out is really good. I like how she has got all her lips, but not the rest of her. I think this gets the attetion beacuse people may think its weird, but i dont think itl stand out as much.
this is the blur album cover, I really like this beacuse its a Julian Opie Theme cover. I think that was a really good idea for a album cover. I also like how they are put into squares with a diffrent coloured background. it makes it stand out, and looks good.
Monday, 17 January 2011
Julian Opie
This is my Julian opie attempt, We done this by taking a photo of my self and then turning it onto photoshop.
Step 1: Get the portrait, then duplicate background layer.
Step 2: you then need to add a new layer and select the paths palette and select new path.
step 3: Now create a path(outline) round the features of your face. i.e.. chin,Hairline,Neckline etc.
Step 4: Once gone all the way round the face you 'Stroke' the line by right clicking. this will make it thicker depending on the brush size. make sure the brush hardness is set to 100% and foreground color is black.
Step 5: you can create new paths layers and complete individual bits by selecting the create path icon at the bottom of the palette
Step 6: When create a path for the lips you can fill the selection using the fill path icon at the bottom of the paths palette.
I found this very interesting to do, as you are making yourself cartooned, and you get to play around with what you look like.
At first i found this quite tricky, but once getting into it, became more easier.
Friday, 14 January 2011
Lyrics
I have googled some of there Lyrics of some of there songs, to indicate the things they sing about.
Rock 'n' Roll..
Jenny said when she was just five years old
You know there's nothing happening at all
Every time she puts on the radio
There was nothing goin' down at all
Then one fine mornin' she puts on a New York station
She couldn't believe what she heard at all
She started dancin' to that fine fine music
You know her life was saved by Rock 'n' Roll
Despite all the amputations
You could just dance to a rock 'n' roll station
Jenny said when she was just five years old
My parents are gonna be the death of us all
Two TV sets and two Cadillac cars--
Ain't gonna help us at all
Then one fine mornin' she puts on a New York station
She don't believe what she heard at all
She started dancin' to that fine fine music
You know her life was saved by Rock 'n' Roll
Despite all the computations
You could just dance to a rock 'n ' roll station
And it was alright.
Oh! Sweet Nuthin
Say a word for Jimmy Brown
He ain't got nothing at all
Not a shirt right of his back
He ain't got nothing at all
And say a word for Ginger Brown
Walks with his head down to the ground
Took the shoes right of his feet
To poor boy right out in the street
He ain't got nothing at all
Not a shirt right of his back
He ain't got nothing at all
And say a word for Ginger Brown
Walks with his head down to the ground
Took the shoes right of his feet
To poor boy right out in the street
And this is what he said
Oh sweet nuthin'
She ain't got nothing at all
Oh sweet nutin'
She ain't got nothing at all
Oh sweet nuthin'
She ain't got nothing at all
Oh sweet nutin'
She ain't got nothing at all
Say a word for Polly May
She can't tell the night from the day
They threw her out in the street
But just like a cat she landed on her feet
And say a word for Joanna Love
She ain't got nothing at all
'Cos everyday she falls in love
And everynight she falls when she does
She can't tell the night from the day
They threw her out in the street
But just like a cat she landed on her feet
And say a word for Joanna Love
She ain't got nothing at all
'Cos everyday she falls in love
And everynight she falls when she does
Subscribe to:
Posts (Atom)


